Repairing a Select-O-Speed Input Shaft
Looking For Something?
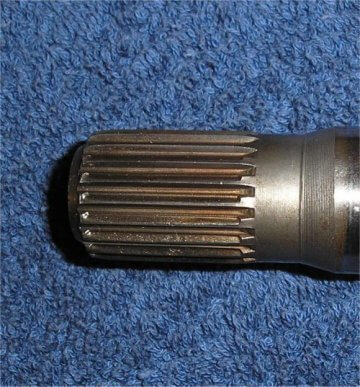
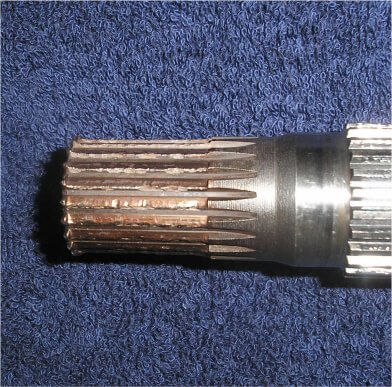
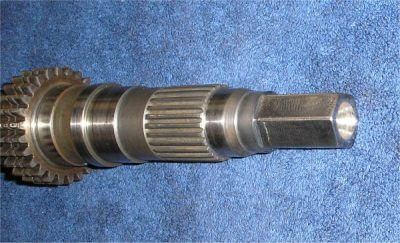
One of the most common failures with the Select-O-Speed transmission is the splines on the input shaft and drive clutch disk.
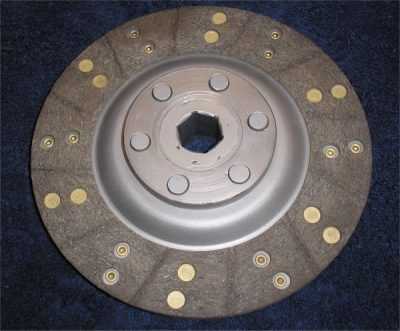
The photos above show a shaft that has the splines worn about half way through and one that is completely stripped off. Many of them strip off completely on the shaft and/or the clutch hub.
Good used ones are becoming hard to find and new ones are very expensive. However, they can be repaired fairly easily by a number of methods.
Because the original splines are very hard, and need to be to hold up, soft weld repairs and re-cutting the splines is a short term fix at best.
The repair needs to be durable if it is going to last for any length of time. The following photos show how we repair them.
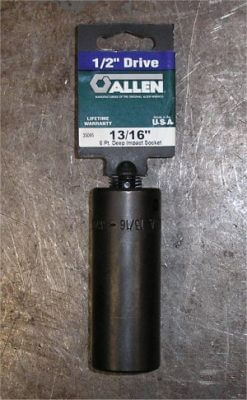
The one item that needs to be purchased is a 13/16″ 6 point deep well impact socket.
This Allen brand is excellent quality, made in the US, and has just the right amount of hex broached into it. Most other brands have a shallow hex.
The rest of the job is almost all machine work. Because the steel is very hard on the shaft and clutch hub, you will need some good carbide tooling. Plan to use up some inserts.
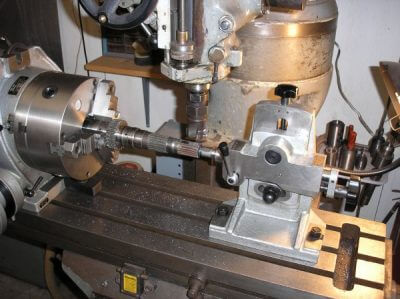
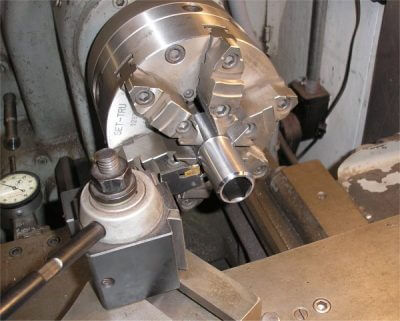
The first step is to mill a hex where the splines used to be. A 13/16″ hex is ideal as it removes a bare minimum of stock from the shaft.
The smaller you make the hex the weaker the shaft will be and this shaft gets a lot of stress. Measure the inside of the socket and cut the hex size to match.
The sockets are made slightly oversize and the hex needs to be slightly oversize as well to keep a good fit to the shaft.
We’ve found that cutting the hex to about .820″ is perfect. It makes a nice slip fit with no wobble.
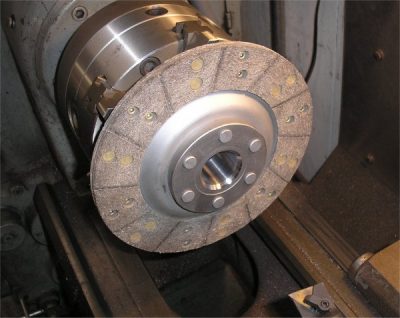
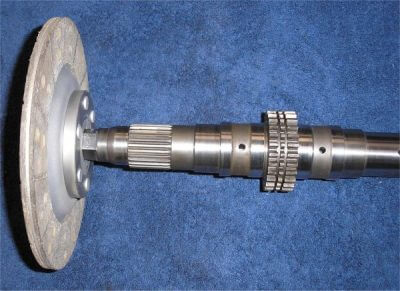
The finished shaft with the newly cut hex end.
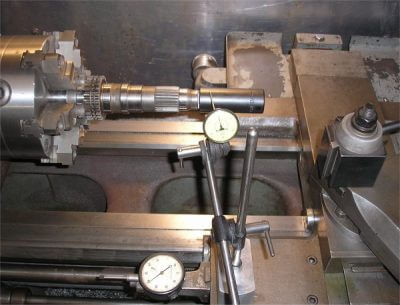
Next, we slip the socket onto the finished shaft and check it with an indicator for concentricity. If the socket was not broached dead center it will wobble.
This one has less than .002″ TIR and will be fine as is. If the TIR exceeds .002″, you can cut the OD of the socket while on the shaft just enough to true it up.
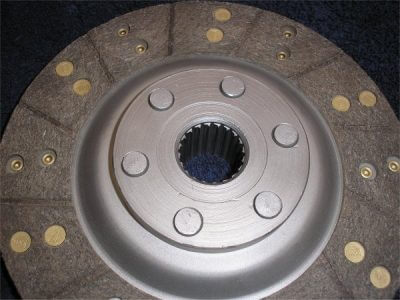
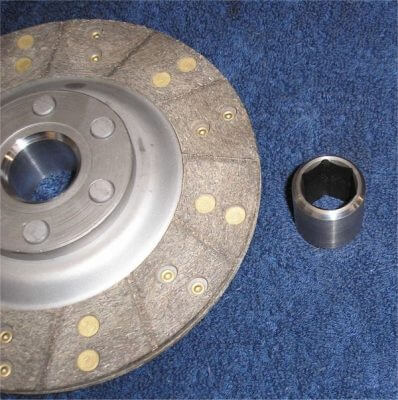
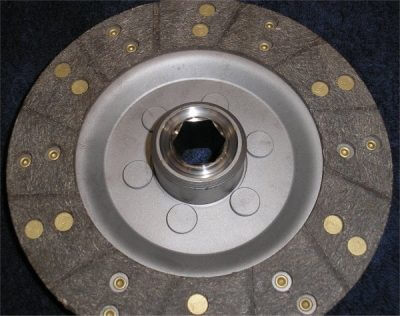
This clutch disk is good except the splines are nearly worn out. You can see the wear is excessive and would not want to use it as is.
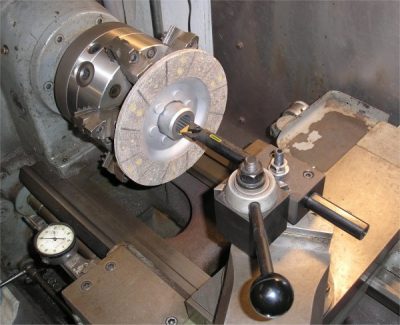
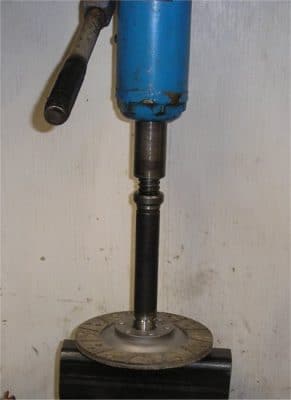
Chuck it up so that it runs straight and true and bore the old splines out of the hub.
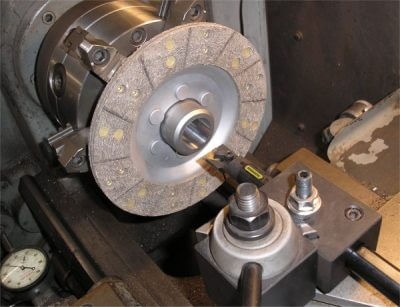
We cut the bore to 1.200″.
Next, cut a nice wide 45 degree chamfer.
And another chamfer on the other end of the bore.
The hex will be welded around each end of the bore, but we always drill at least one and preferably 2 cross holes. The cross holes are filled with weld after the hex is pressed in for some added safety against it ever coming loose.
Now we turn the socket to 1.201″ or 1.2015″ diameter. This will make a nice press fit to the bore in the clutch hub. Put a wide 45 degree chamfer on the socket end and part it off to 1.300″ long.
After it’s parted off, turn it around and put a matching chamfer on the opposite end. Now it’s ready to install.
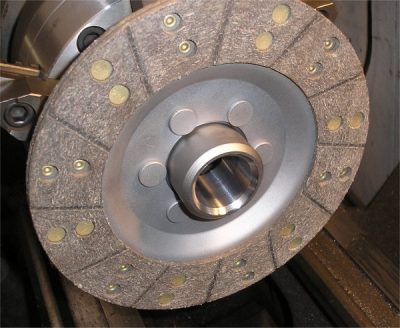
Press the hex insert fully into the clutch hub.
After it’s pressed in the center hex insert should be flush with the end of the clutch hub and have a nice wide “vee” on the end that will be filled with weld.
The opposite end should look the same.
Next, the vee grooves and cross holes are filled with weld. Use plenty of heat for a good penetration but don’t burn into the ID of the hex. We use a special blue Eutectic repair rod designed for this type of work.

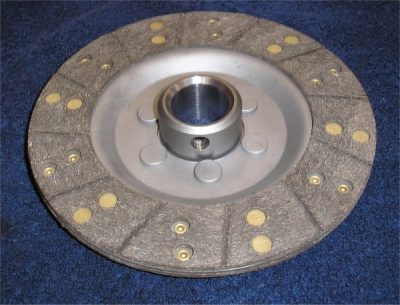
The welds can be faced off smooth or left alone. We prefer to clean them up a little to maintain original hub dimensions.
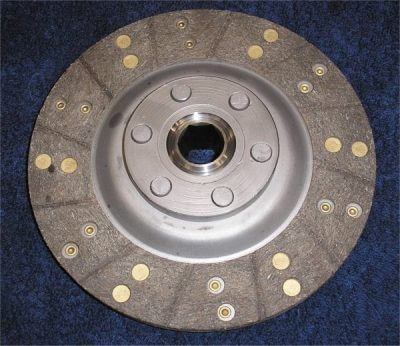
The finished shaft and clutch hub ready to go another 45 years. The fit is very good and we feel this is a very durable and fairly inexpensive way to repair these components.
Thanks to John Smith of Old Ford Tractor for allowing us to use this information.