Sherman Drawing & Installation
Looking For Something?

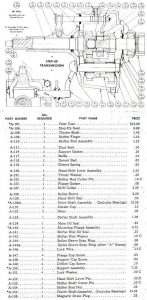
Split the tractor. Remove the clutch fork and shaft. Remove the brake shaft. Remove the transmission input shaft and tube. If you’ve had a Sherman Step-Up installed before, you will have a shifter hole already drilled in the transmission case. If not, locate and drill a 1 1/4″ hole. Without a template to mark the hole location, you may find it easier to temporarily install the Sherman, then mark the hole location from the inside. Remove the Sherman and drill the hole at your mark. Remove the Sherman rear mounting plate and output shaft and bolt it on the tractor transmission using 2 shims and a gasket. Rotate the shaft as you tighten the bolts and note the effort required. You should feel the shaft tighten just slightly as the bolts are pulled up and any backlash should disappear. The bearing load is correct when a very slight increase in the effort required to turn the shaft is noted. Add or remove shims until the load is correct when the bolts are tight. Do not load the bearing too tight! A little loose is better than too tight. Once you have determined the correct number of shims needed (if any) pull the mounting plate back out and apply Permatex #2 gasket sealer to the rear mating surfaces of the Sherman mounting plate and reinstall it. Remove the front input shaft from the Sherman. Mount the Sherman case to the rear mounting plate using Permatex on both sides of the gasket. Be sure the sliding gear is in the shifting fork, long end to the front. Add 1 pint of gear lube to the Sherman case. Use the same type gear lube as you are using in the regular tractor transmission. Don’t skip this step! Install the input shaft and tube on the Sherman with Permatex on the gasket. Install the shifter. Turn the Sherman input shaft as you shift the Sherman between high and low to be sure it is shifting into gear correctly. Reassemble the tractor.
Thanks to John Smith of Old Ford Tractor for allowing us to use this information.

